A Wiki for Your SOCs
You are reading part one of a series I wrote called, A Wiki for Your SOCs. In this specific blog post, I will explain what a Security Operations Center (SOC) is and outline how to install an application called Tiki Wiki which can be used as a web portal. My intent with this series is to ultimately demonstrate how personnel assigned to a SOC can use free & open-source alternatives like Tiki Wiki to track issues, share documents, and advertise information.
What is a Security Operations Center?
An incident is a confirmed violation of an organization’s security policy. A Security Operations Center (SOC) is a facility where potential incidents are visualized, monitored, and processed. With a SOC, an organization can efficiently reduce the probability and impact of an incident. Without a SOC, an organization will have a limited understanding of their security posture and fewer capabilities to protect itself.
The catalyst of a Security Operations Center is the handful of portals and dashboards where data is aggregated, normalized, and presented in a uniform fashion. To facilitate the various widgets they need, SOC personnel can either purchase expensive software with licenses that expire or use free & open-source software alternatives. One example is Tiki Wiki. In the context of Internet technology, a Wiki is a web site people can edit and use for collaboration. The namesake of its original software was inspired by a shuttle in Hawaii.
How to Install Tiki Wiki
To start, you will need a LAMP (Linux, Apache, MariaDB, and PHP) stack consisting of the following software packages:
- Ubuntu Linux Server 18.10
- Apache 2.4.34
- MariaDB 10.1.29
- PHP 7.2
To download all of the packages required, use the following commands.
apt-get install \
	apache2 libapache2-mod-php \
	php7.2 php7.2-xml php7.2-gd \
	mariadb-server php-mysqli
To double-check your software versions, use the commands below.
lsb_release -ir # check Ubuntu Linux OS version
apache2 -v	# check Apache web server version
mysql -V	# check MariaDB server version
php -v		# check PHP hypertext preprocessor version
Since we’re setting all of this up for a SOC (and it’s good practice), use the script provided with your MariaDB instance to secure your database server configuration.
mysql_secure_installation
NOTE: RUNNING ALL PARTS OF THIS SCRIPT IS RECOMMENDED FOR ALL MariaDB
      SERVERS IN PRODUCTION USE!  PLEASE READ EACH STEP CAREFULLY!

In order to log into MariaDB to secure it, we'll need the current
password for the root user.  If you've just installed MariaDB, and
you haven't set the root password yet, the password will be blank,
so you should just press enter here.

Enter current password for root (enter for none):
Once your database server is secured, login and create a database & user account for the Tiki Wiki application.
mysql -u root -p
CREATE DATABASE dbTikiWiki;
GRANT ALL PRIVILEGES ON dbTikiWiki.* TO 'tikiuser'@'localhost' IDENTIFIED BY 'tikiuser' WITH GRANT OPTION;
You can verify your database and user account were created using these two commands.
SHOW DATABASES;
SELECT user FROM mysql.user GROUP BY user;
Then, use wget and the URL below to download the latest version of Tiki Wiki. NOTE: I tested all of the commands outlined for this setup using Tiki Wiki 18.02 (your setup may not work if you use a different version).
wget https://sourceforge.net/projects/tikiwiki/files/latest/download
The download file is of the .zip format, so you will need to de-compress it when you’re done downloading it.
apt-get install unzip # optional step if you don't have unzip installed
unzip download
After the Tiki Wiki software has ben downloaded & de-compressed, install it under the default web-page serving location Apache uses and assign the required permssions (www-data must own the primary directory and all of its contents).
cp -r tiki-18.2/* /var/www/html/
# Apache uses the www-data account to run
chown -R www-data:www-data /var/www/html/
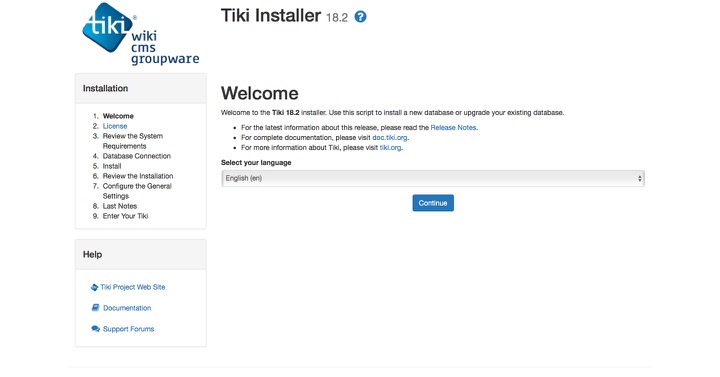
Finally, open a web browser and navigate to your Tiki Wiki instance by using the IP address of the server you installed it on
http://192.168.56.5
If all went well, you should be presented with a installer menu like below.
If not, and you see the default Apache index.html web-page, you may need to move that file elsewhere or delete it.
# optional step if you don't see the Tiki Install menu
mv /var/www/html/index.html /root/
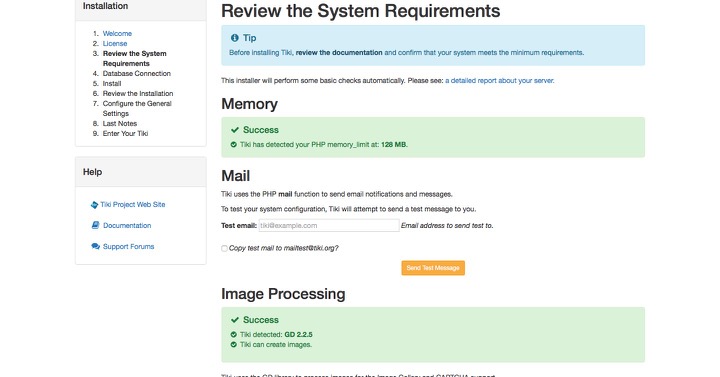
The next menu is for addressing any failed Tiki Wiki requirement checks. Make sure to resolve any major errors before proceeding.
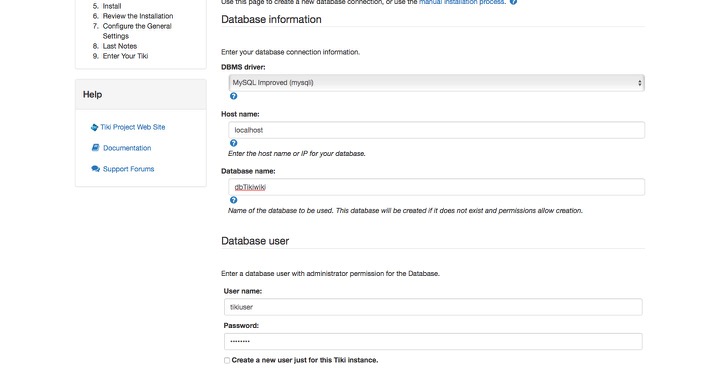
Under the Database Connection menu, delcare the database and user account created earlier (dbTikiWiki and tikiuser).
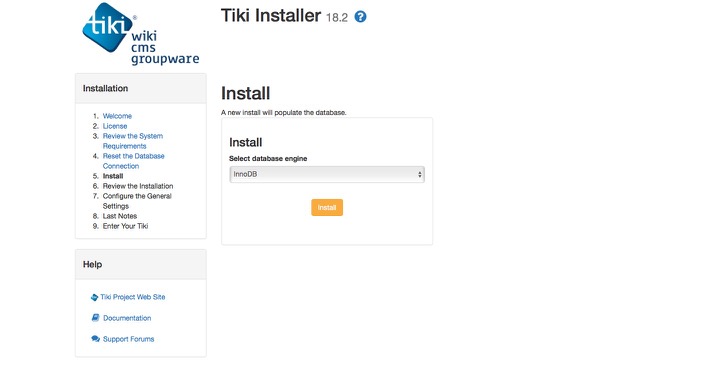
Next, select the default database engine and click-on Install. This step will take a few minutes depending on the hardware you’re using.
Once the database installation is complete, click-on Continue.

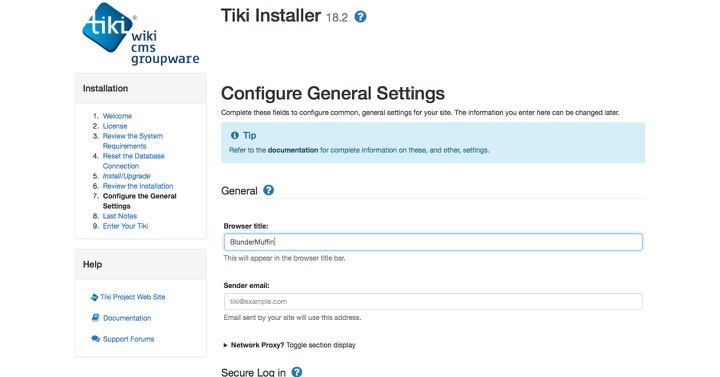
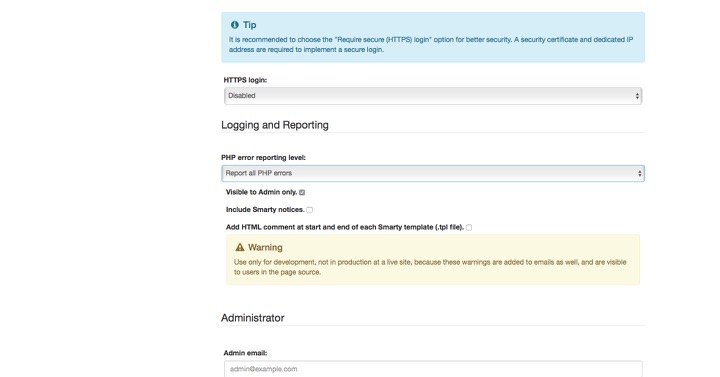
On the Configure General Settings menu, specify your portal name, required login options, and Logging and Reporting preferences. I recommend selecting Report all PHP errors and checking Visible to Admin Only.
I will cover how to setup and enforce HTTPS in an updated post later.
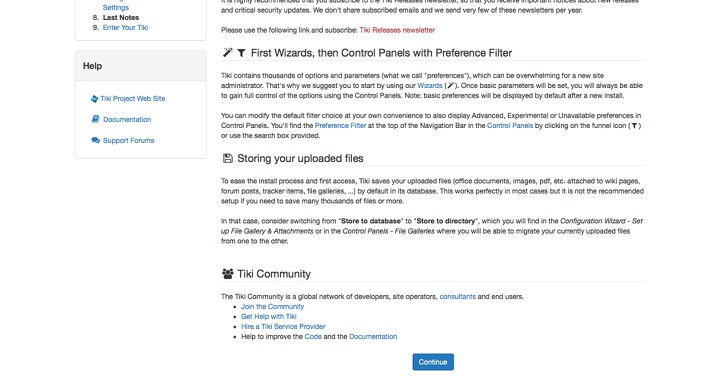
On the Last Notes menu, pay special attention to the text about where Tiki Wiki saves files (we’ll use File Galleries to consolidate and share SOC-related items).
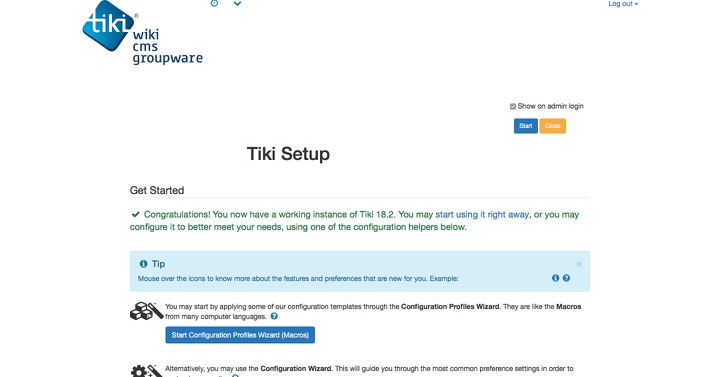
Finally, click-on Enter Tiki and Lock Installer (Recommended) to complete the installation.
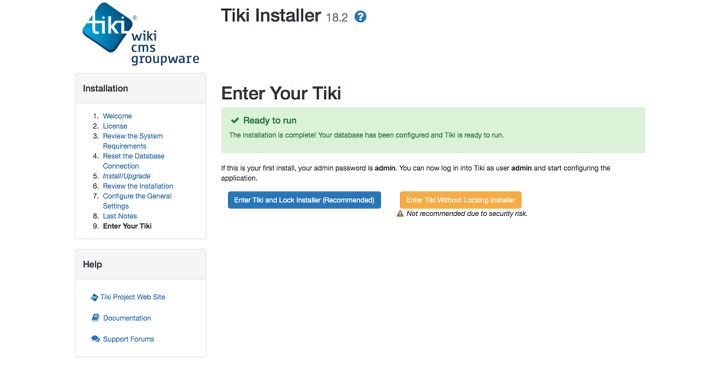
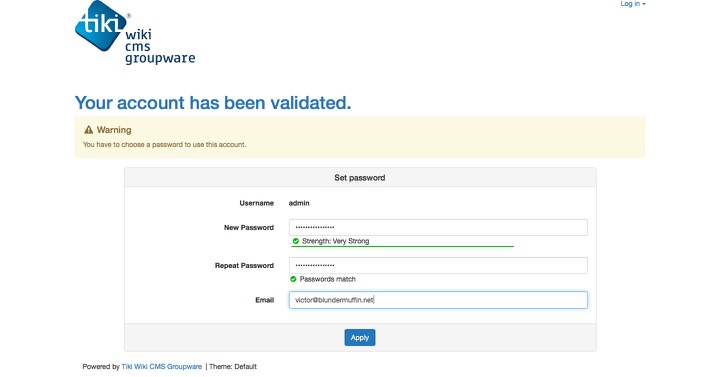
Prior to landing on the Home Page, you will be prompted to change the default password from admin to something else (there’s a link below if you get locked-out by the way).
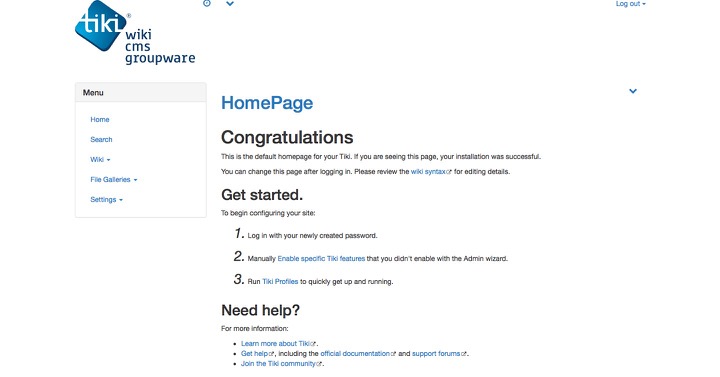
Congratulations! Your portal should now be ready to be secured, populated, and used for SOC-related activities. Click-on the Close button to proceed to the Home Page.
Check-out the next blog post of this series to learn about SOC functional areas and how to use Role-based Access Control (RBAC) to design a web portal.
References
- LinuxConfig.org: How To Upgrade Ubuntu To 18.10 Cosmic Cuttlefish
- LinuxConfig.org: How to configure static IP address on Ubuntu 18.10 Cosmic Cuttlefish Linux
- AskUbuntu.com: Netplan
- WebsiteForStudents: Setup Tiki Wiki Groupware CMS On Ubuntu 16.04
- StackOverflow: PHP7 install ext-dom issue
- StackOverflow: Call to undefined function mysqli_connect()
- Tiki: How to administrate Tiki from inside Tiki, when install is complete and correct